Getting Started with Google Search Console
Google Search Console is a free tool by Google that helps website owners monitor and improve their presence in Google Search results. If you are serious about SEO, this tool should be one of the first platforms you set up for your website. It provides real data about how your site performs in search, which keywords bring traffic, and whether Google can properly crawl and index your pages.

Why It Matters for Beginners
When you launch a website or blog, you need accurate performance insights. Google Search Console shows how many people see your pages in search results (impressions), how many click on them (clicks), and your average ranking position. Instead of guessing what works, you can make SEO decisions based on actual search data.
Setting Up Your Account
To get started, sign in using your Google account and add your website as a property. After adding your site, you must verify ownership. Verification can be done by uploading an HTML file, adding a meta tag, updating DNS records, or linking with Google Analytics. Once verified, the system begins collecting data about your site’s performance.
Submitting Your Sitemap
Submitting an XML sitemap is an important step. A sitemap helps Google understand your website structure and discover new pages quickly. This is especially helpful for new websites that want faster indexing.
Understanding the Performance Report
The Performance report is one of the most valuable sections. It shows:
- Search queries people use to find your site
- Pages that receive the most traffi
- Click-through rate (CTR)
- Average ranking position
By analyzing this data, you can optimize content, improve titles and meta descriptions, and focus on high-potential keywords.
Checking Indexing and Errors
The Pages (Indexing) report shows which pages are indexed and which have issues. If a page is not indexed, the tool explains the reason. Fixing these errors improves your chances of ranking in search results.
Connecting and Verifying Your Website in Search Console
Before you can access website data inside Google Search Console, you must first connect and verify ownership of your site. This step is essential because Google needs confirmation that you are the rightful owner or authorized manager of the website. Without verification, you cannot see performance reports, indexing details, or technical error notifications.
Add Your Website PropertyAfter signing in to Google Search Console with your Google account, click on “Add Property.” You will see two options:
- Domain Property – Tracks all versions of your domain (http, https, www, non-www).
- URL Prefix Property – Tracks a specific URL version only.
- For beginners, URL Prefix is often easier to set up, while Domain Property gives broader tracking coverage.
Choose a Verification Method
Once you add your property, you must verify ownership. Google offers several verification methods:
HTML File Upload Download the verification file provided by Search Console and upload it to your website’s root directory. After uploading, click verify.
HTML Meta Tag Copy the meta tag provided and paste it into the <head> section of your homepage. Save changes and verify.
DNS Record Verification Add a TXT record to your domain’s DNS settings. This method is required for Domain Property verification and may take some time to update.
Google Analytics Connection If you already use Google Analytics, you can verify instantly by linking it, provided you have admin access.
Confirm Successful VerificationAfter completing one of the methods, click the “Verify” button. If done correctly, you will see a confirmation message. Once verified, Google will begin collecting data about your website’s search performance.
Why Verification Is Important
Verification gives you full access to valuable data such as keyword rankings, indexing status, crawl errors, and security issues. It also ensures that only authorized users can manage the site inside Search Console.
How to Analyze Search Impressions, Clicks, and CTR
Understanding search impressions, clicks, and CTR is essential for improving SEO performance. Inside Google Search Console, these metrics are available in the Performance report and help you measure how well your website is performing in Google Search results.
Understanding Search Impressions
Impressions show how many times your website appeared in search results. This does not mean users clicked your page — it simply means your page was shown.
If impressions are high but clicks are low, it may indicate that your title or meta description is not attractive enough. High impressions are a positive sign because they show your content is visible and ranking for relevant keywords.
Understanding ClicksClicks represent how many users actually clicked on your page from search results. This metric shows real traffic coming from Google Search.
If clicks are increasing over time, it means your SEO strategy is working. If impressions are growing but clicks remain low, you need to improve your headlines, optimize meta descriptions, or target better search intent.
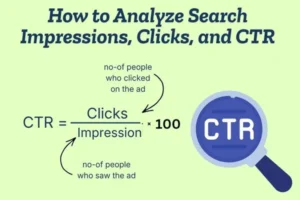
Understanding CTR (Click-Through Rate)
CTR is the percentage of impressions that turned into clicks. It is calculated as:
CTR = (Clicks ÷ Impressions) × 100
For example, if your page received 1,000 impressions and 50 clicks, your CTR is 5%.
A low CTR usually means:
- Your title is not compelling
- Your meta description is weak
- Your page ranking is too low (positions below 5 often get fewer clicks)
Improving CTR can increase traffic without changing your ranking position.
How to Analyze These Metrics Effectively
First, compare impressions and clicks together. High impressions with low clicks signal optimization opportunities.
Second, filter by individual pages to see which content performs best. This helps you understand what type of topics and keywords attract more engagement.
Third, check average position along with CTR. Pages ranking between positions 5–15 often have high potential. A small optimization can push them to the top results and significantly increase clicks.
Using the Data to Improve SEO
When analyzing impressions, clicks, and CTR:
- Update titles with power words and clear benefits
- Improve meta descriptions to match search inten
- Target long-tail keywords for higher relevance
- Optimize content for featured snippets
Unlocking Keyword Insights from the Performance Report
The Performance report inside Google Search Console is one of the most powerful tools for understanding how your website ranks in Google Search. It provides real data about the keywords (search queries) that bring visibility and traffic to your site. By analyzing this report properly, you can discover hidden keyword opportunities and improve your SEO strategy.
Understanding the Query DataIn the Performance report, the “Queries” tab shows the exact search terms users type before finding your website. This data is extremely valuable because it reveals:
- Keywords you are already ranking for
- Long-tail keywords you didn’t intentionally target
- High-impression keywords with growth potential
Instead of guessing what keywords work, you see real search behavior from users.
Identifying High-Impression, Low-Click Keywords
One of the best strategies is to look for keywords with high impressions but low clicks. This usually means your page appears in search results but does not attract enough attention.
To improve this:
- Rewrite your title to make it more compelling
- Improve your meta description
- Match content more closely with search intent
Small optimizations can significantly increase traffic without needing new content.
Finding Quick Ranking OpportunitiesCheck keywords where your average position is between 8 and 20. These are “low-hanging fruit” opportunities. With better on-page SEO, internal linking, and content improvements, you can push these keywords into the top 5 positions, which usually leads to higher CTR and more traffic.
Discovering Content GapsSometimes the Performance report shows keywords related to your topic but not fully covered in your content. These are content gap opportunities. You can create new blog posts or expand existing articles to target those related queries more effectively.
Analyzing Page-Level PerformanceSwitch to the “Pages” tab to see which pages generate the most impressions and clicks. Then combine it with the Queries filter to understand which keywords are driving traffic to each specific page. This helps you optimize strategically instead of randomly editing content.
Using Filters for Deeper Insights
You can filter data by:
- Date range (compare last 3 months vs previous period)
- Device (mobile vs desktop performance)
- Country (targeting specific regions)
These filters help you understand trends and seasonal changes in keyword performance.
Turning Insights into Action
After analyzing the Performance report:
- Update underperforming titles
- Improve content dept
- Add internal links to important pages
- Target new long-tail keywords
Mastering the URL Inspection Tool for Better Indexing
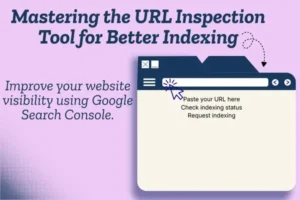
Introduction to the URL Inspection Tool
The URL Inspection Tool inside Google Search Console helps you understand how Google views a specific page on your website. It provides detailed insights into whether your page is indexed and if there are any technical issues affecting its visibility in search results.
Checking Index StatusWhen you enter a URL into the inspection bar, the tool shows whether the page is indexed or not. If the page is indexed, it means it is eligible to appear in search results. If it is not indexed, the report explains the reason, such as crawl issues or quality-related concerns. This helps you quickly identify what needs to be fixed.
Understanding Crawl and Coverage Details
The inspection report includes important information such as the last crawl date, crawl status, and coverage details. These insights help you understand whether Googlebot can access your page properly and whether there are any blocking issues like noindex tags or robots.txt restrictions.
Using the Live Test FeatureThe “Test Live URL” option allows you to check the current version of your page in real time. This is useful when you have recently updated content or fixed technical errors. It confirms whether Google can access the updated version successfully.
Requesting IndexingIf you publish a new page or improve an existing one, you can click “Request Indexing.” This asks Google to re-crawl the page. While it does not guarantee immediate ranking, it speeds up the process of getting your content reviewed and potentially indexed.
Why It Improves Indexing
Mastering the URL Inspection Tool ensures your important pages are accessible, error-free, and properly indexed. When Google can crawl and index your pages without problems, your chances of ranking and gaining organic traffic increase significantly.
Fixing Coverage Errors to Improve Search Visibility
Understanding Coverage ErrorsCoverage errors appear in the Pages (Indexing) report inside Google Search Console. These errors indicate that some of your website pages are not being indexed properly by Google. If a page is not indexed, it cannot appear in search results, which directly affects your search visibility and organic traffic.
Common Types of Coverage Errors
Some of the most common coverage issues include:
Crawled – Currently Not IndexedGoogle has crawled the page but decided not to index it. This often happens due to thin or low-quality content.
Discovered – Currently Not IndexedGoogle knows about the page but has not crawled it yet. This may occur due to crawl budget limitations or weak internal linking.
Page with RedirectThe page redirects to another URL. Make sure the redirect is intentional and correctly implemented.
Blocked by Robots.txtYour robots.txt file may be preventing Google from crawling important pages.
Submitted URL Marked ‘Noindex’The page has a noindex tag, which tells Google not to include it in search results.
How to Fix Coverage Errors
First, identify the exact issue shown in the report. Each error type requires a different solution.If the issue is related to thin content, improve the page by adding valuable, detailed, and relevant information.If internal linking is weak, add links from other important pages so Google can easily discover and crawl the URL.
If robots.txt or noindex tags are blocking the page accidentally, remove or adjust them carefully.For redirect issues, ensure the final destination URL is correct and functional.
Validate Fix After CorrectionAfter resolving the issue, go back to Google Search Console and click “Validate Fix.” This asks Google to re-check the affected pages. If everything is corrected properly, the error status will eventually be cleared.
Why Fixing Coverage Errors Matters
Unresolved coverage errors prevent your content from appearing in search results. Even well-written articles will not rank if they are not indexed. By regularly monitoring and fixing these issues, you improve your site’s overall health and increase the chances of better rankings.
Submitting XML Sitemaps for Faster Crawling
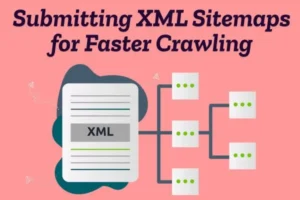
The Role of XML Sitemaps in SEO An XML sitemap acts as a structured roadmap of your website, helping search engines like Google easily discover and understand your content. It lists the most important URLs you want to be crawled and indexed. Instead of relying only on internal links, a sitemap ensures that search engines are directly informed about your key pages.
Why Faster Crawling Matters
Crawling is the process where search engines scan your website to find new or updated content. If crawling is slow or inefficient, your pages may take longer to appear in search results. By submitting an XML sitemap, you guide search engines to your important pages quickly, improving the chances of faster indexing and better visibility.
How to Submit a Sitemap in Google Search Console
To submit your sitemap, log in to Google Search Console and select your website property. Navigate to the “Sitemaps” section, enter your sitemap URL (such as yourwebsite.com/sitemap.xml), and click submit. Once submitted, Google begins processing the file and crawling the listed URLs.
Benefits for New and Growing Websites
Submitting XML sitemaps is especially helpful for new websites, large websites, and blogs that publish content regularly. It ensures that newly published pages are discovered quickly. For websites with complex structures or weak internal linking, a sitemap becomes even more important for proper crawling.
Best Practices for Maximum Effectiveness
For best results, include only high-quality, indexable pages in your sitemap. Avoid adding broken links, redirected URLs, or duplicate pages. Keep your sitemap updated whenever you publish or remove content. Regular monitoring inside Google Search Console helps you detect and fix any sitemap-related errors.
Using Search Queries to Build a Smart Content Strategy
Understanding the Power of Search Queries
Search queries are the exact words and phrases users type into search engines like Google. These queries reveal real user intent, interests, and problems. Instead of guessing what your audience wants, you can use actual search data to guide your content decisions. This makes your content strategy smarter, data-driven, and more effective.
Finding Search Queries in Google Search Console
Inside Google Search Console, the Performance report shows a “Queries” tab where you can see which keywords bring impressions and clicks to your website. This data helps you identify:
- Keywords you are already ranking for
- High-impression keywords with low clicks
- Long-tail keywords you did not intentionally target
- New topic ideas based on user searches
This insight becomes the foundation of a smart content plan.
Identifying High-Opportunity Keywords
Look for queries with high impressions but lower average positions (for example, ranking between positions 8–20). These are strong opportunities. By updating existing content, improving headings, and adding more depth, you can push these keywords higher in search results and increase traffic without creating new articles.
Discovering Content Gaps
Sometimes search queries reveal topics your audience is searching for, but you have not fully covered. These gaps show opportunities to create new blog posts, guides, or FAQs. Building content around these real queries ensures you meet actual user demand instead of writing random topics.
Optimizing Existing Content with Query DataSearch query data can help you refine your current articles. If a page ranks for related keywords, you can naturally include those terms within headings and paragraphs to strengthen relevance. This improves topical authority and increases your chances of ranking for multiple variations of a keyword.
Aligning Content with Search IntentEvery query reflects a type of intent — informational, navigational, or transactional. By analyzing the wording of search queries, you can adjust your content format. For example, “how to” queries require detailed guides, while comparison queries need structured comparisons. Matching content to intent increases engagement and CTR.
Turning Data into a Long-Term StrategyA smart content strategy is built on continuous analysis. Regularly review search queries, track performance changes, and update your content accordingly. Over time, this approach strengthens your authority, improves rankings, and builds sustainable organic traffic.
Tracking Core Web Vitals for Technical SEO Success
![]()
Understanding Core Web Vitals
Core Web Vitals are a set of performance metrics introduced by Google to measure real-world user experience on websites. These metrics focus on loading speed, interactivity, and visual stability. They are an important part of technical SEO because they directly impact how users experience your site and how search engines evaluate its quality.
The three main Core Web Vitals metrics are:
- Largest Contentful Paint (LCP) – Measures loading performance.
- First Input Delay (FID) – Measures interactivity.
- Cumulative Layout Shift (CLS) – Measures visual stability.
Improving these metrics helps create a faster, smoother browsing experience.
Why Core Web Vitals Matter for SEO User experience is a ranking factor. When your website loads slowly or shifts unexpectedly, visitors may leave quickly, increasing bounce rate. Strong Core Web Vitals scores signal that your website is optimized for performance and usability, which supports better search visibility and higher engagement.
Monitoring Core Web Vitals in Search Console You can track Core Web Vitals inside Google Search Console under the “Core Web Vitals” report. This report groups pages into categories such as “Good,” “Needs Improvement,” or “Poor.” It helps you identify which URLs require optimization.
The report is based on real user data, meaning it reflects actual performance from visitors rather than just lab tests.
Common Issues Affecting Core Web Vitals
Several technical factors can negatively impact your scores, including:
- Large image or video files
- Slow server response time
- Excessive JavaScrip
- Poorly optimized fonts
- Ads or elements that shift page layout
Identifying and fixing these issues improves both user experience and SEO performance.
Steps to Improve Core Web Vitals
To enhance performance:
- Optimize and compress image
- Enable browser caching
- Use a reliable hosting provider
- Minimize unused CSS and JavaScript
- Implement lazy loading for images